Making DIY Austrian Blinds for the Bedroom | A fusion design for our unique windows | How-To Austrian Blinds
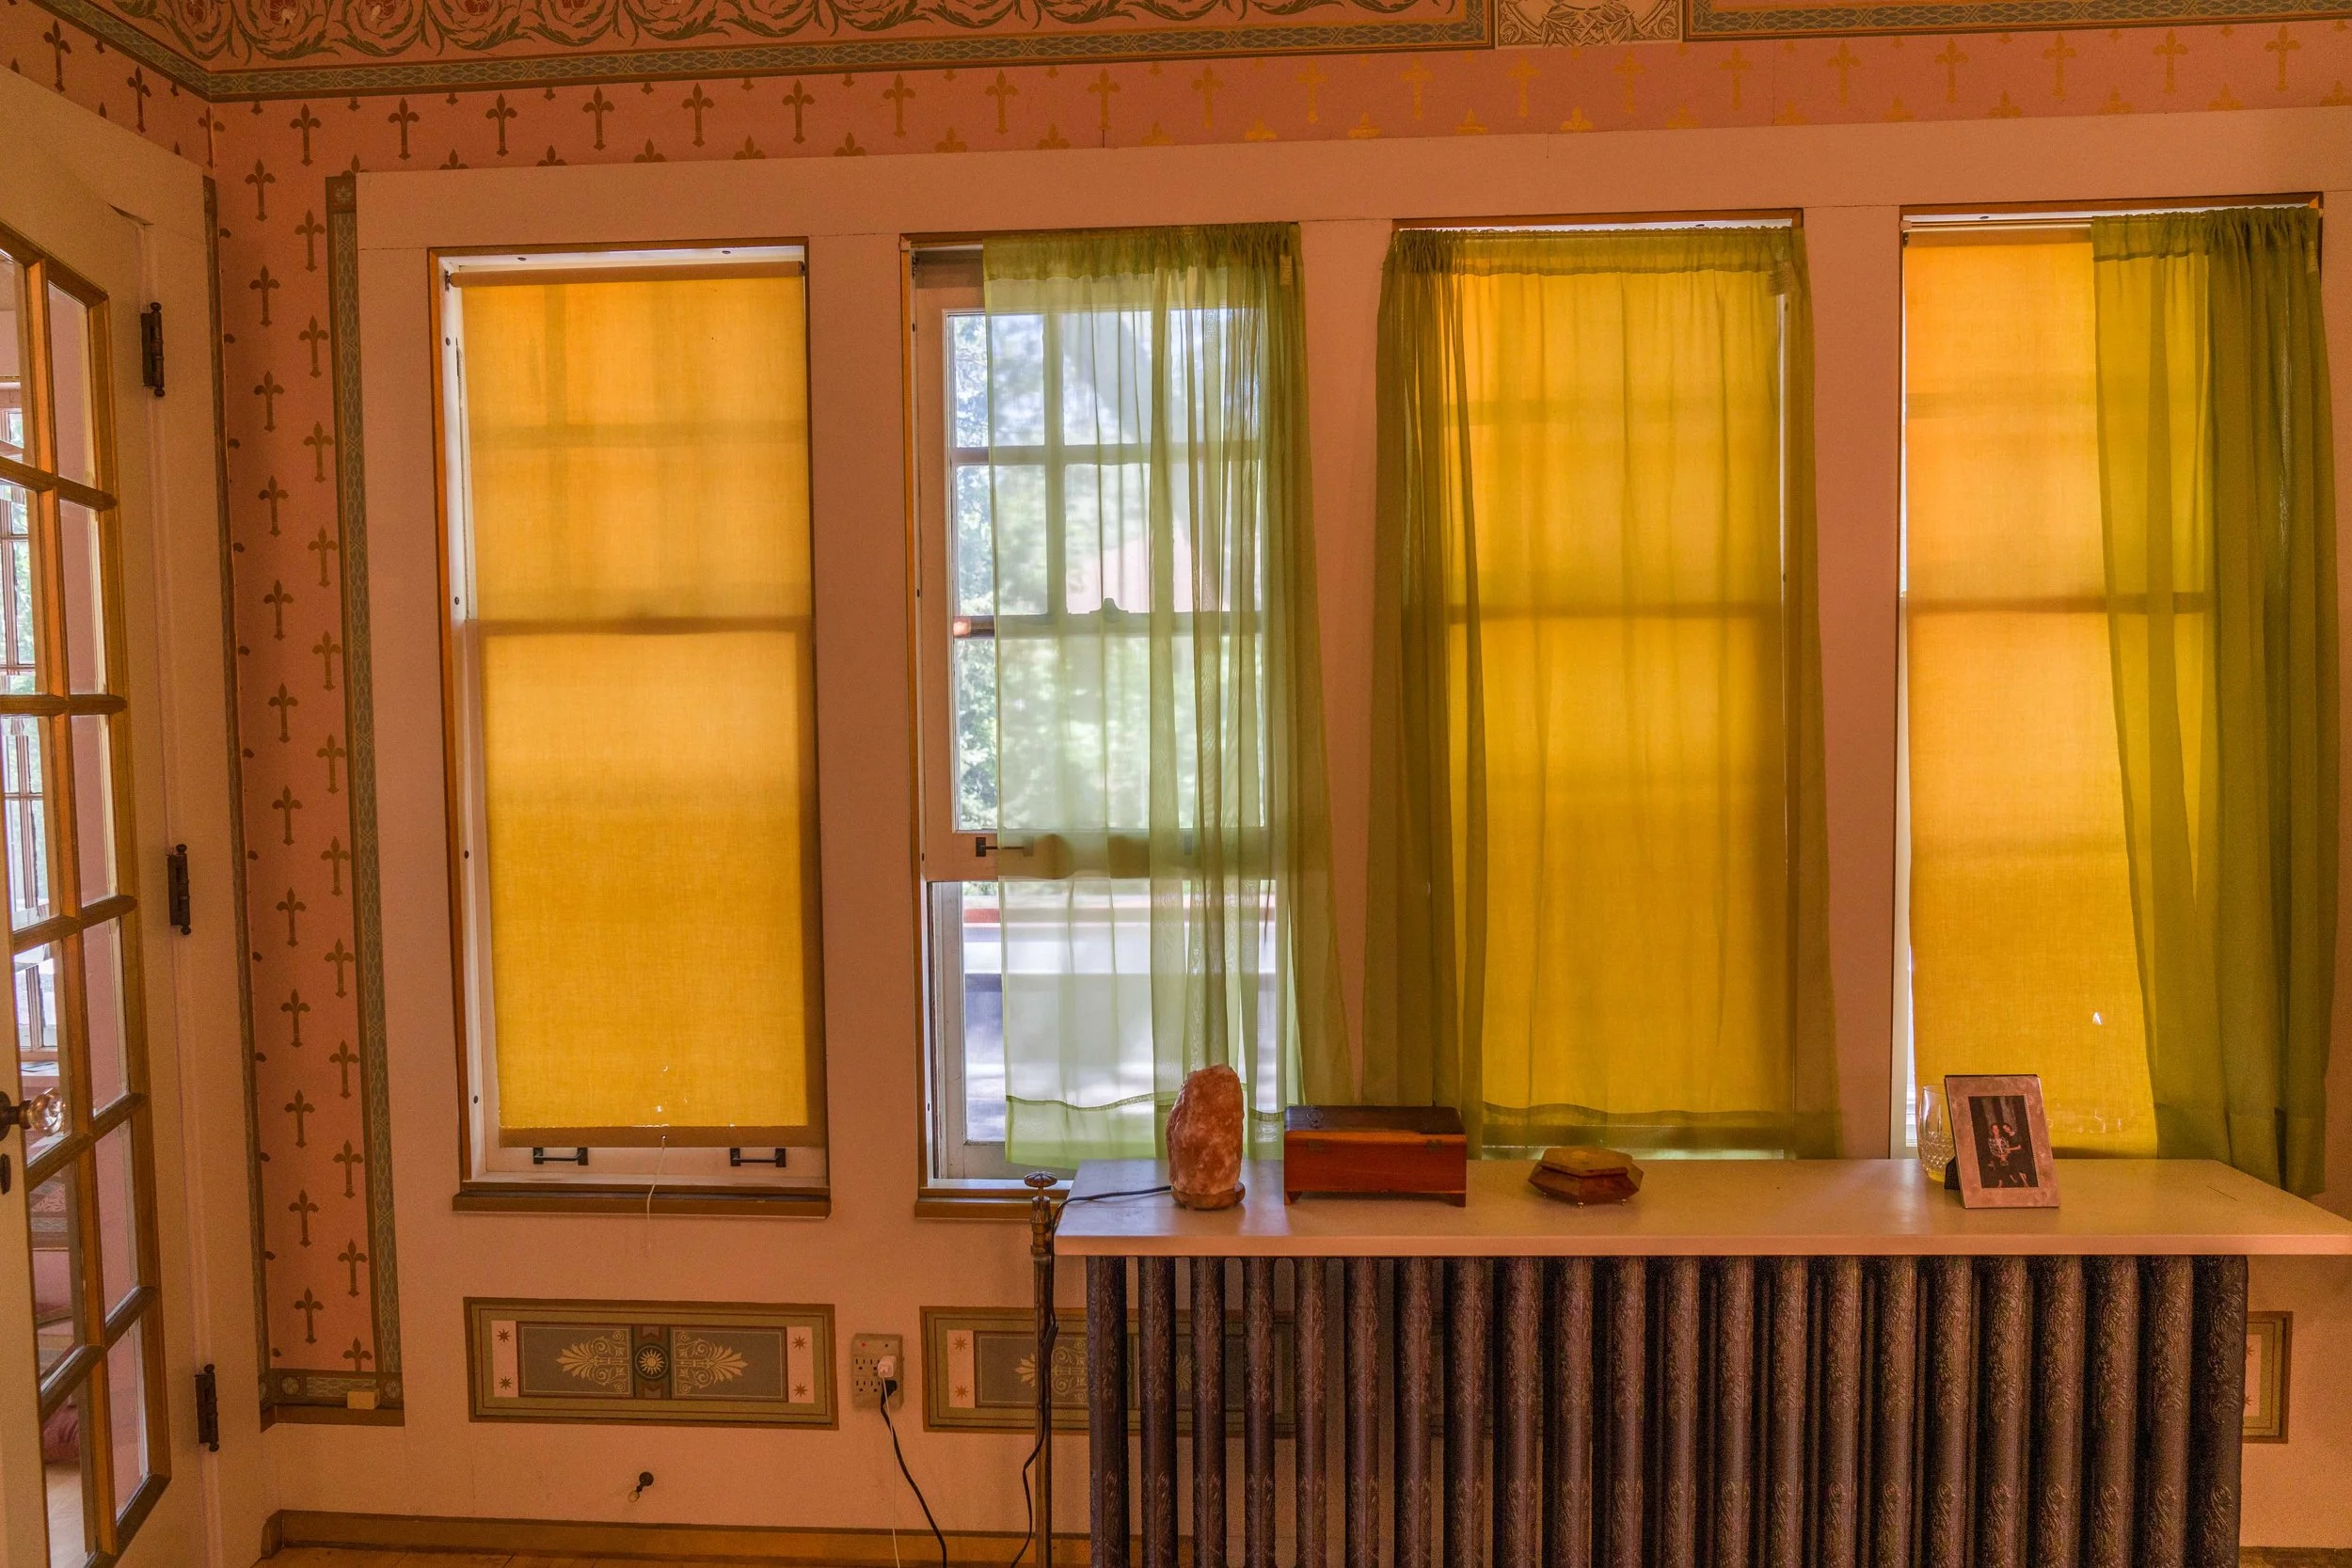
Before
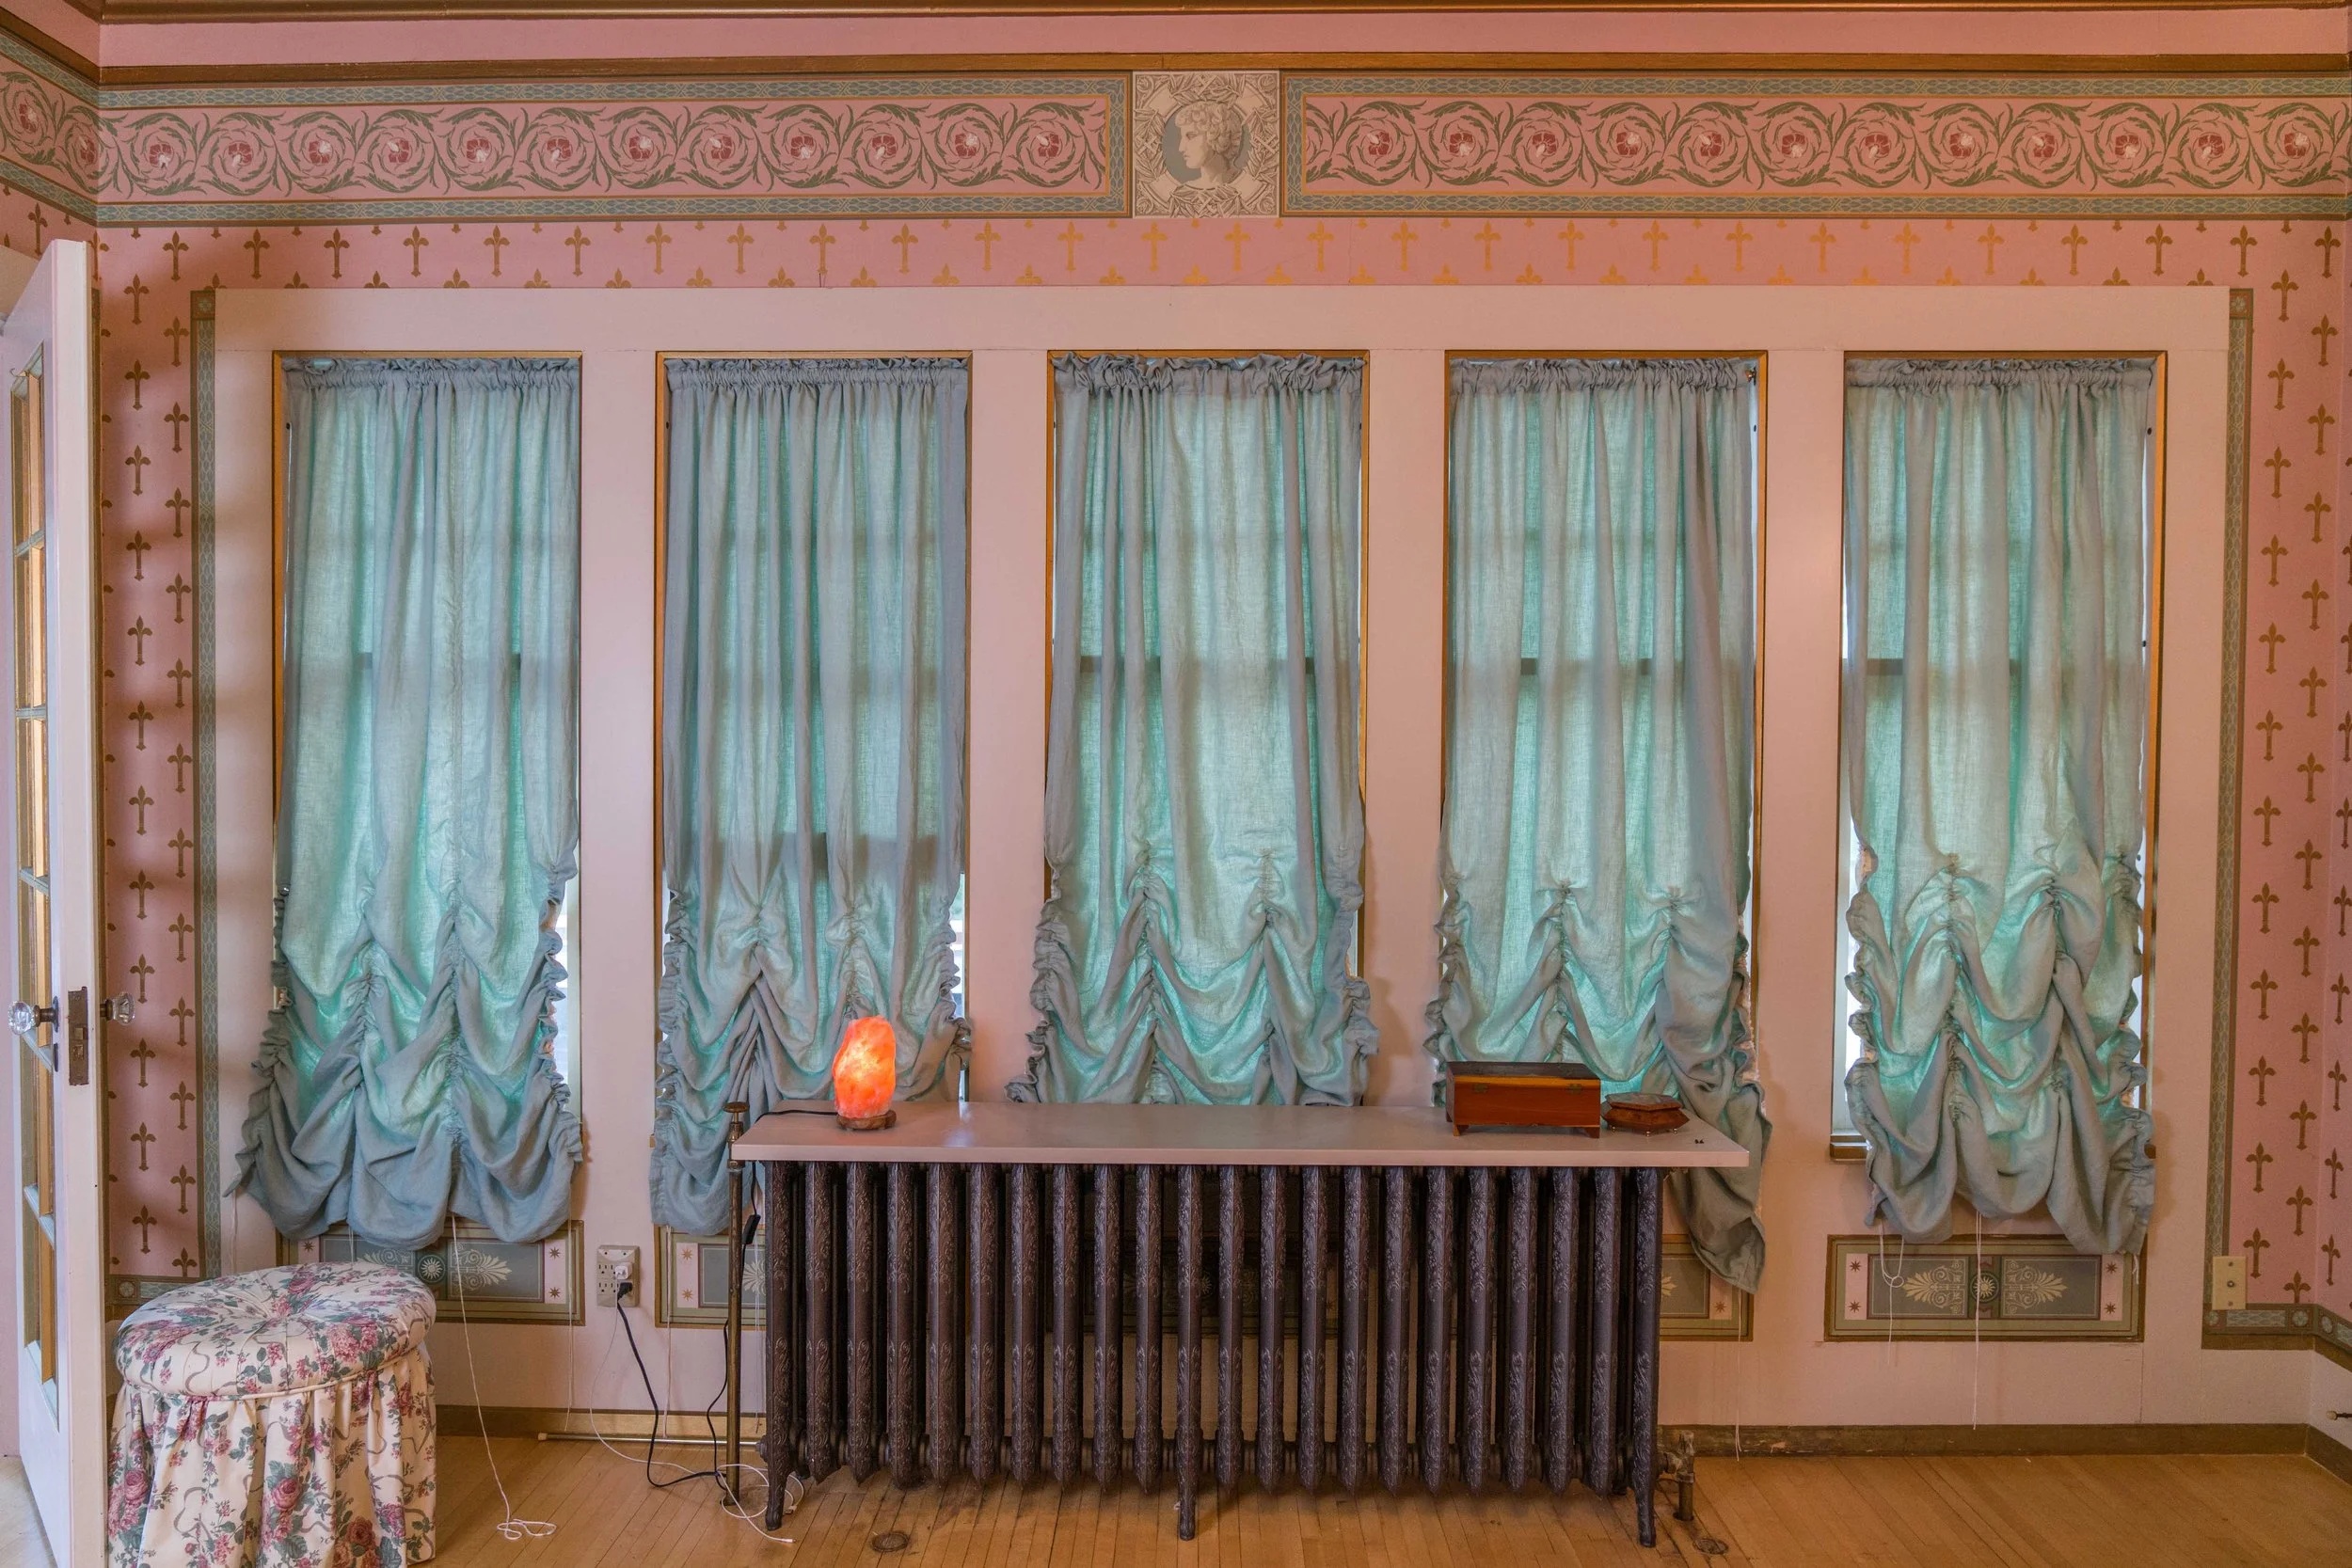
After (still need to tie off strings and do final fluff & poof adjustments) Still on the hunt for hooks to tie back as well!
This project took so much longer to complete than expected, wow!
Thank you to my mom for the help with everything. Overall this took us a few months to complete. From the initial idea and planning phase, to the research phase, to the prototype creation & alteration, to the final outcome that I can present to you today.
This was a much-needed project, needed for functionality & design.
As you can see originally our bedroom and the whole house is outfitted with yellowed ripped paper roller curtains. They are a pain to open and close, they rip, they stay stuck, they are ugly, the list could go on and on, they needed to go!
First room to tackle, the master bedroom. For obvious reasons, we sleep in there, want to be able to have privacy and something better to match the interior than yellowed paper and lime green polyester that was left over.
So, my first thought was the humble “Roman Blind” in linen. I looked at prices online, looked at images, and eventually decided the Roman was quite boring, but I did not know much about window treatments at that time and thought it was better than a typical polyester drape, or some mass market internet blind.
Enter my mom, she had the literal Encyclopedia of Window Treatments at home. Oh wow! Look at those options, I was overwhelmed. Cloud, swag, balloon, what ever would be best?! How does one choose, and how come there is not really much information about window treatments on the internet anymore. This is really a lost art form, these thoughts all raced in my mind.
Eventually, I decided that the Austrian Blind would be best, in “Meadow” color linen. Now typically Austrian blinds are sheer and unlined, and any information I could find online on how-tos was minimal.
There really is not much information out there on the internet about curtain construction!! How can this be?!
Determined I went back to basics, books. I scoured the internet trying to find any curtain research book. I eventually found and purchased most of the used books I could get my hands on, on the topic of soft home furnishing construction and window treatments. By now I feel like I can reference and identify most curtain types. I now know what a cascading swag is, what curtains to use in an informal kitchen space, what materials work best. You get the picture. Research paid off and has led me to have more excitement for the next rooms, plus hours of researching fabrics online to find the perfect material for the look I want.
I am kind of hooked on soft interior furnishings now and drapery.
So first things first.
We measured the windows. Proper measuring is crucial along with planning.
-Numerous thoughts and concerns flooded my mind. I decided against a rod with panels because 1. the wallpaper trim along the ceiling is beautiful, I didn’t want to cover that up with a rod, then do you place a rod awkwardly below too low? Since the rod should be hung up close to the ceiling. 2. Since the windows are long and narrow with 3. a radiator 4. along a corner with 5. French doors would the rod jut out into the French doors?
So I decided, a panel for every individual window! This way it would highlight the architectural detail of the long narrow wall of windows, plus the beveled gold painted accent edge. Ok, so how do I hang it? I like Austrian, it is feminine, flowy, and somewhat formal, but how do you install hardware to lift it? How does it stay up? How long should I make it, should it touch the ground? I like the wallpaper below, plus there is a radiator? Ok, make it to the wallpaper midway to the ground.
The designing and planning took a while, but the window was measured, and then we could cut the fabric.
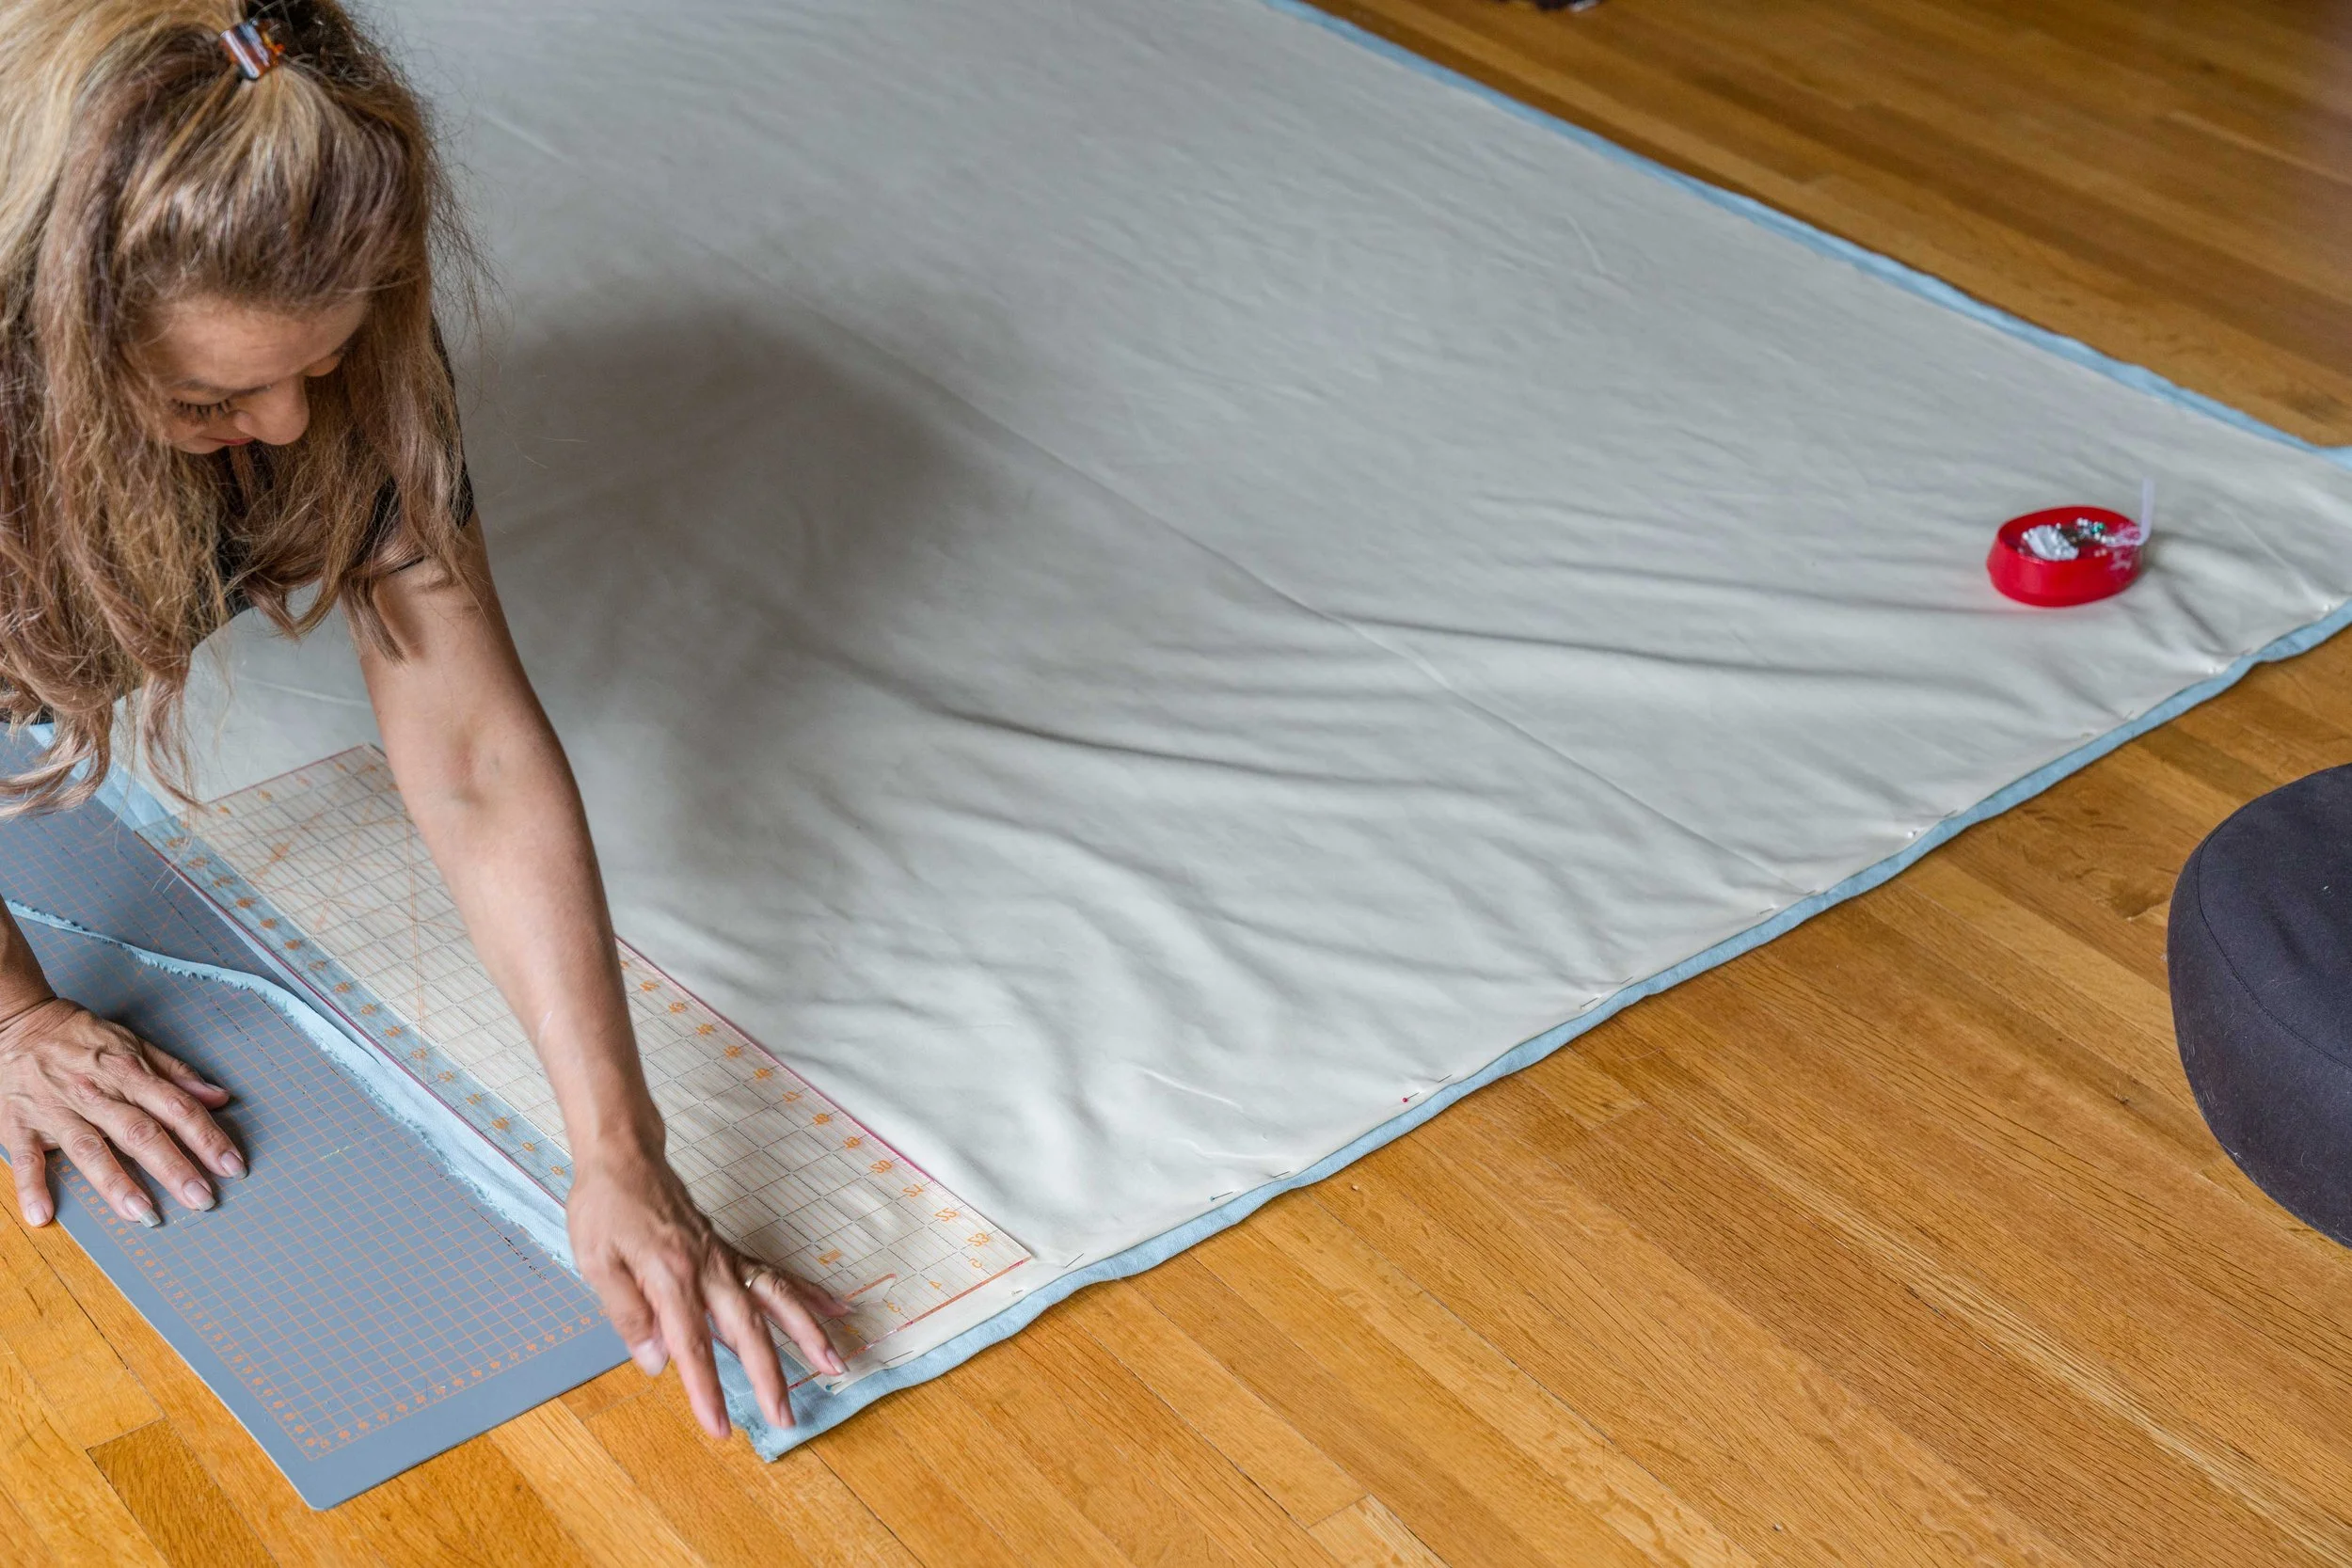
We measured and did the math for our fabric (Linen in Meadow) plus the liner for privacy. I used this incredible liner, again hours of research for a liner… but it is made in the UK, feels luxurious, and is some of the best liner I have come across. It is great! It is from Kabanni Textiles, I originally purchased on Etsy, then directly from their website when I ran out.
The measurements:
The window width itself measures 25 inches. We multiplied by 2 for the Austrian Shade. To equal 50.
The linen was 59 inches wide pre-wash then 57 in. post.
The liner was 54 inches wide.
We just factored the 54 inches of the liner to work for the window. Factoring pinning, hemming, etc.
The window length was 64 inches. We added 20 inches to the length of the linen and liner. For a total of 84 in.
Measurements out of the way (double and add 20 inches) we cut and pinned the fabric with a rotary cutter.
The Hardware:
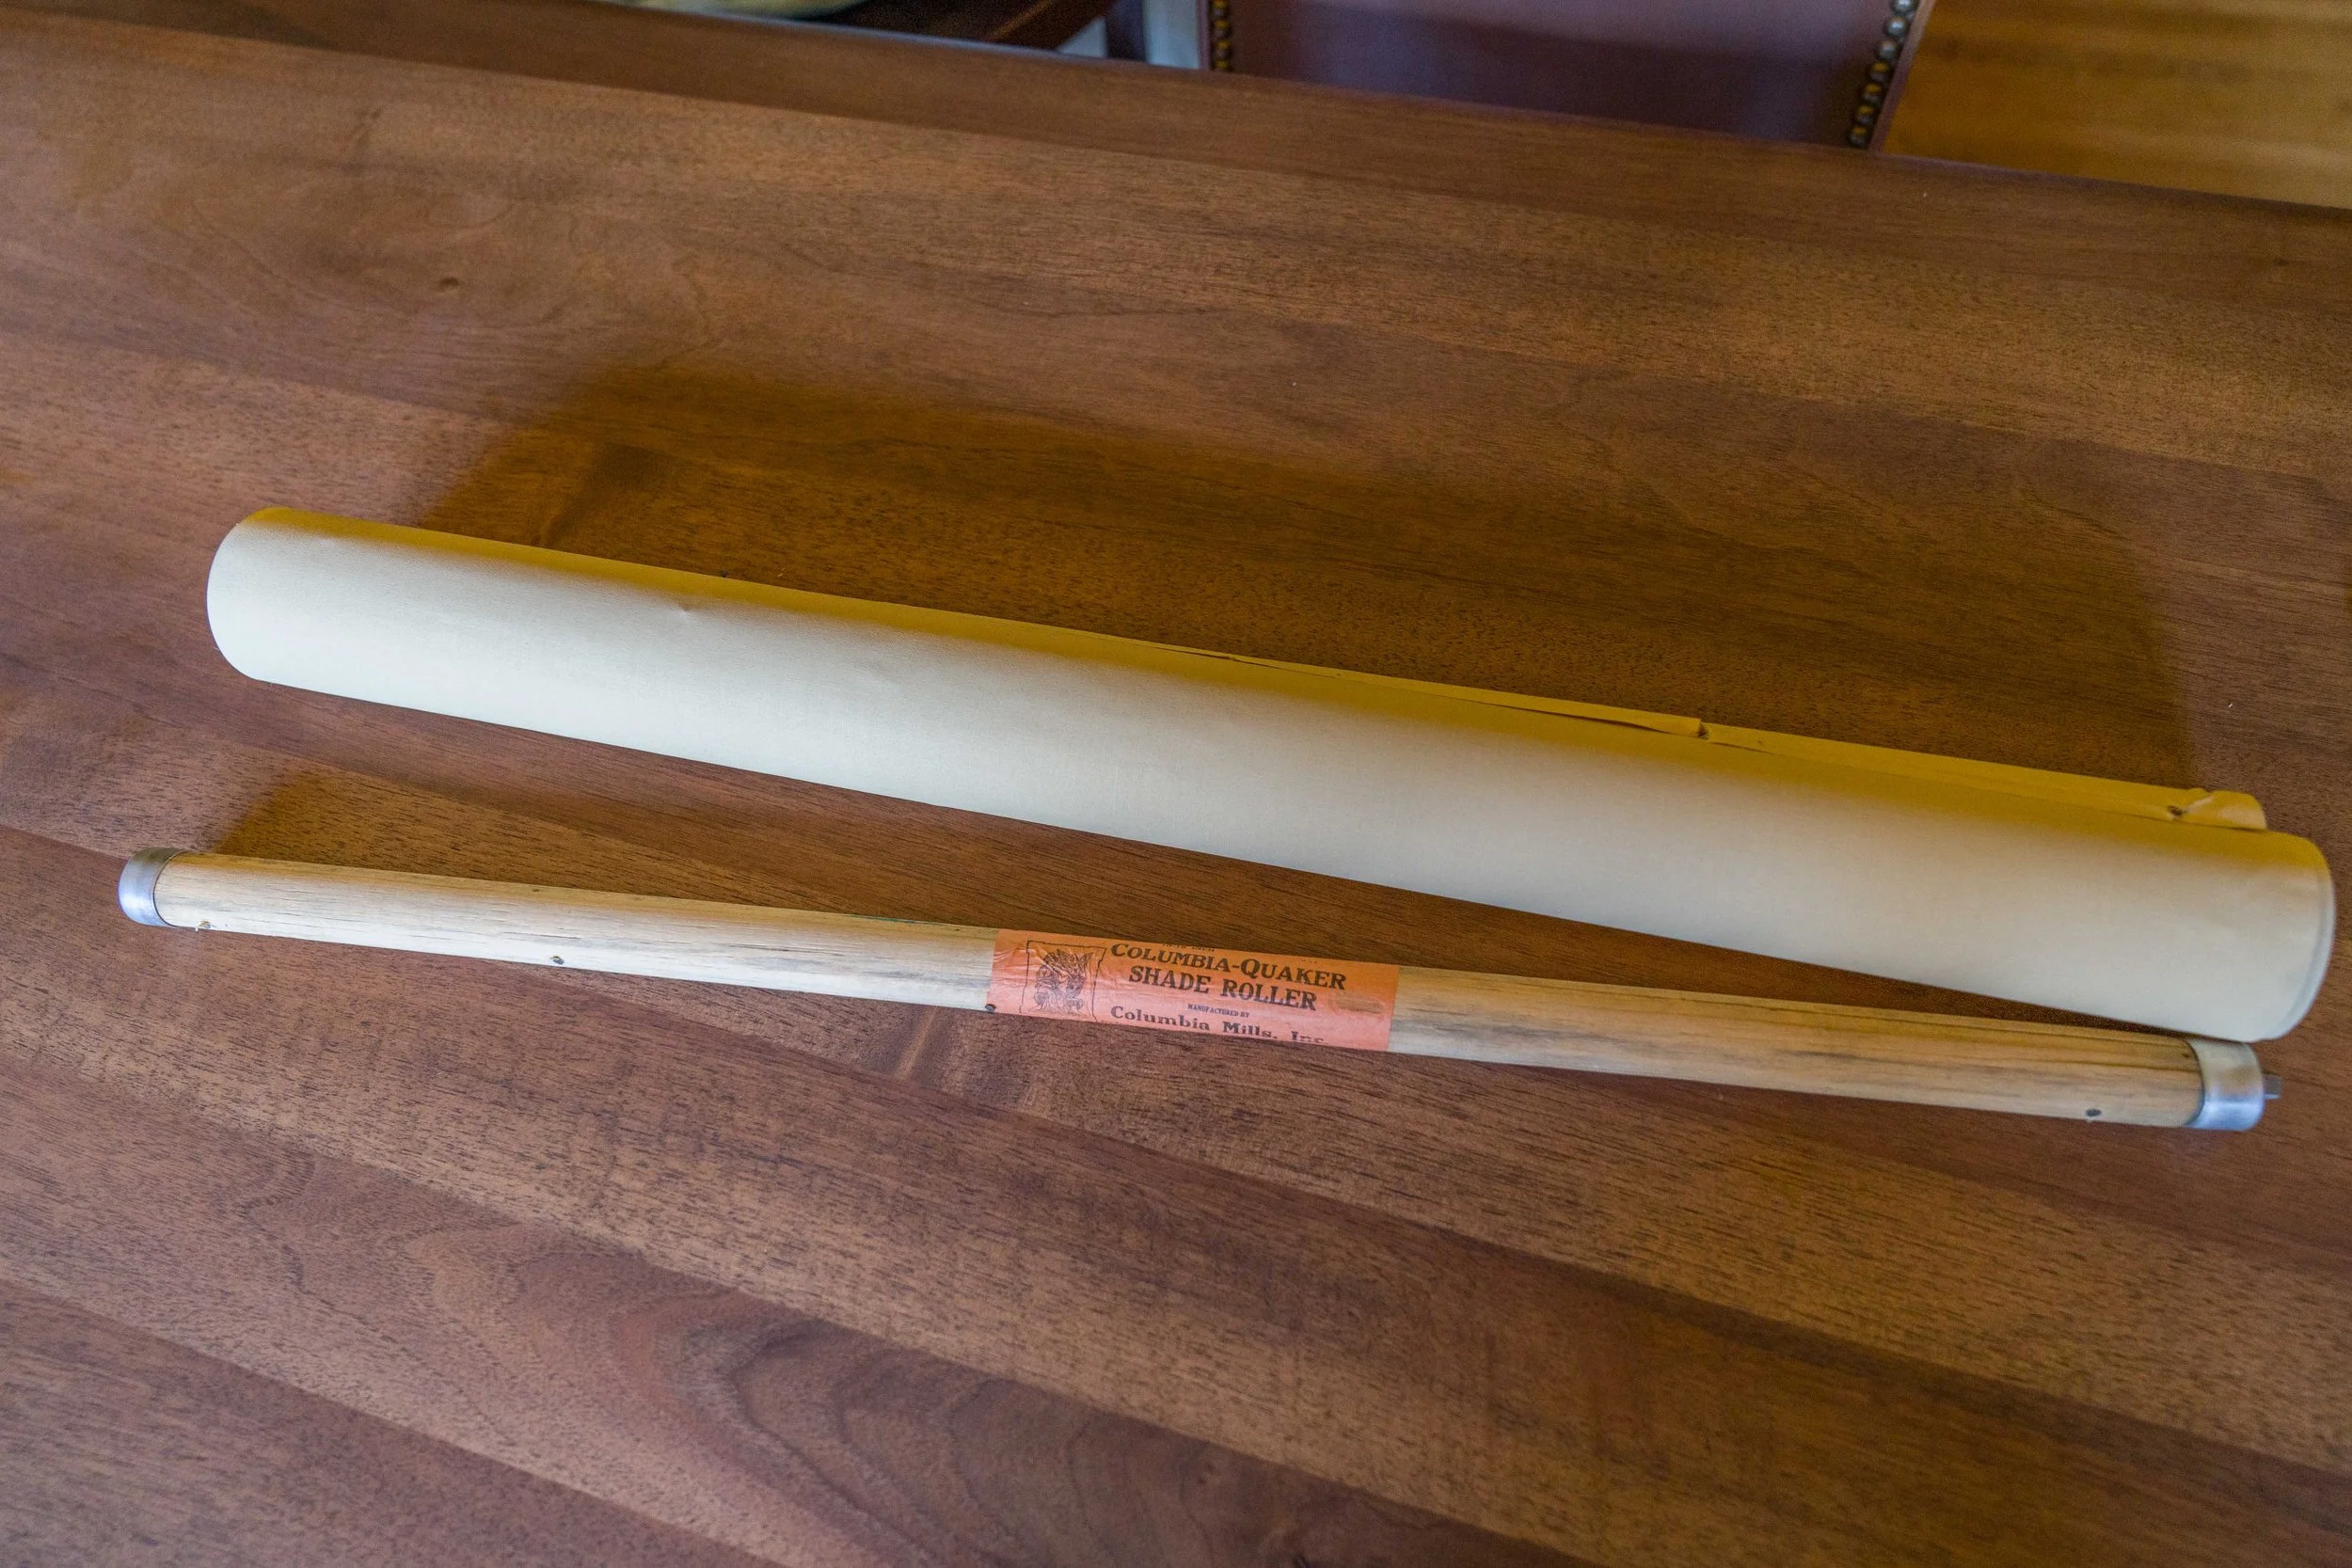
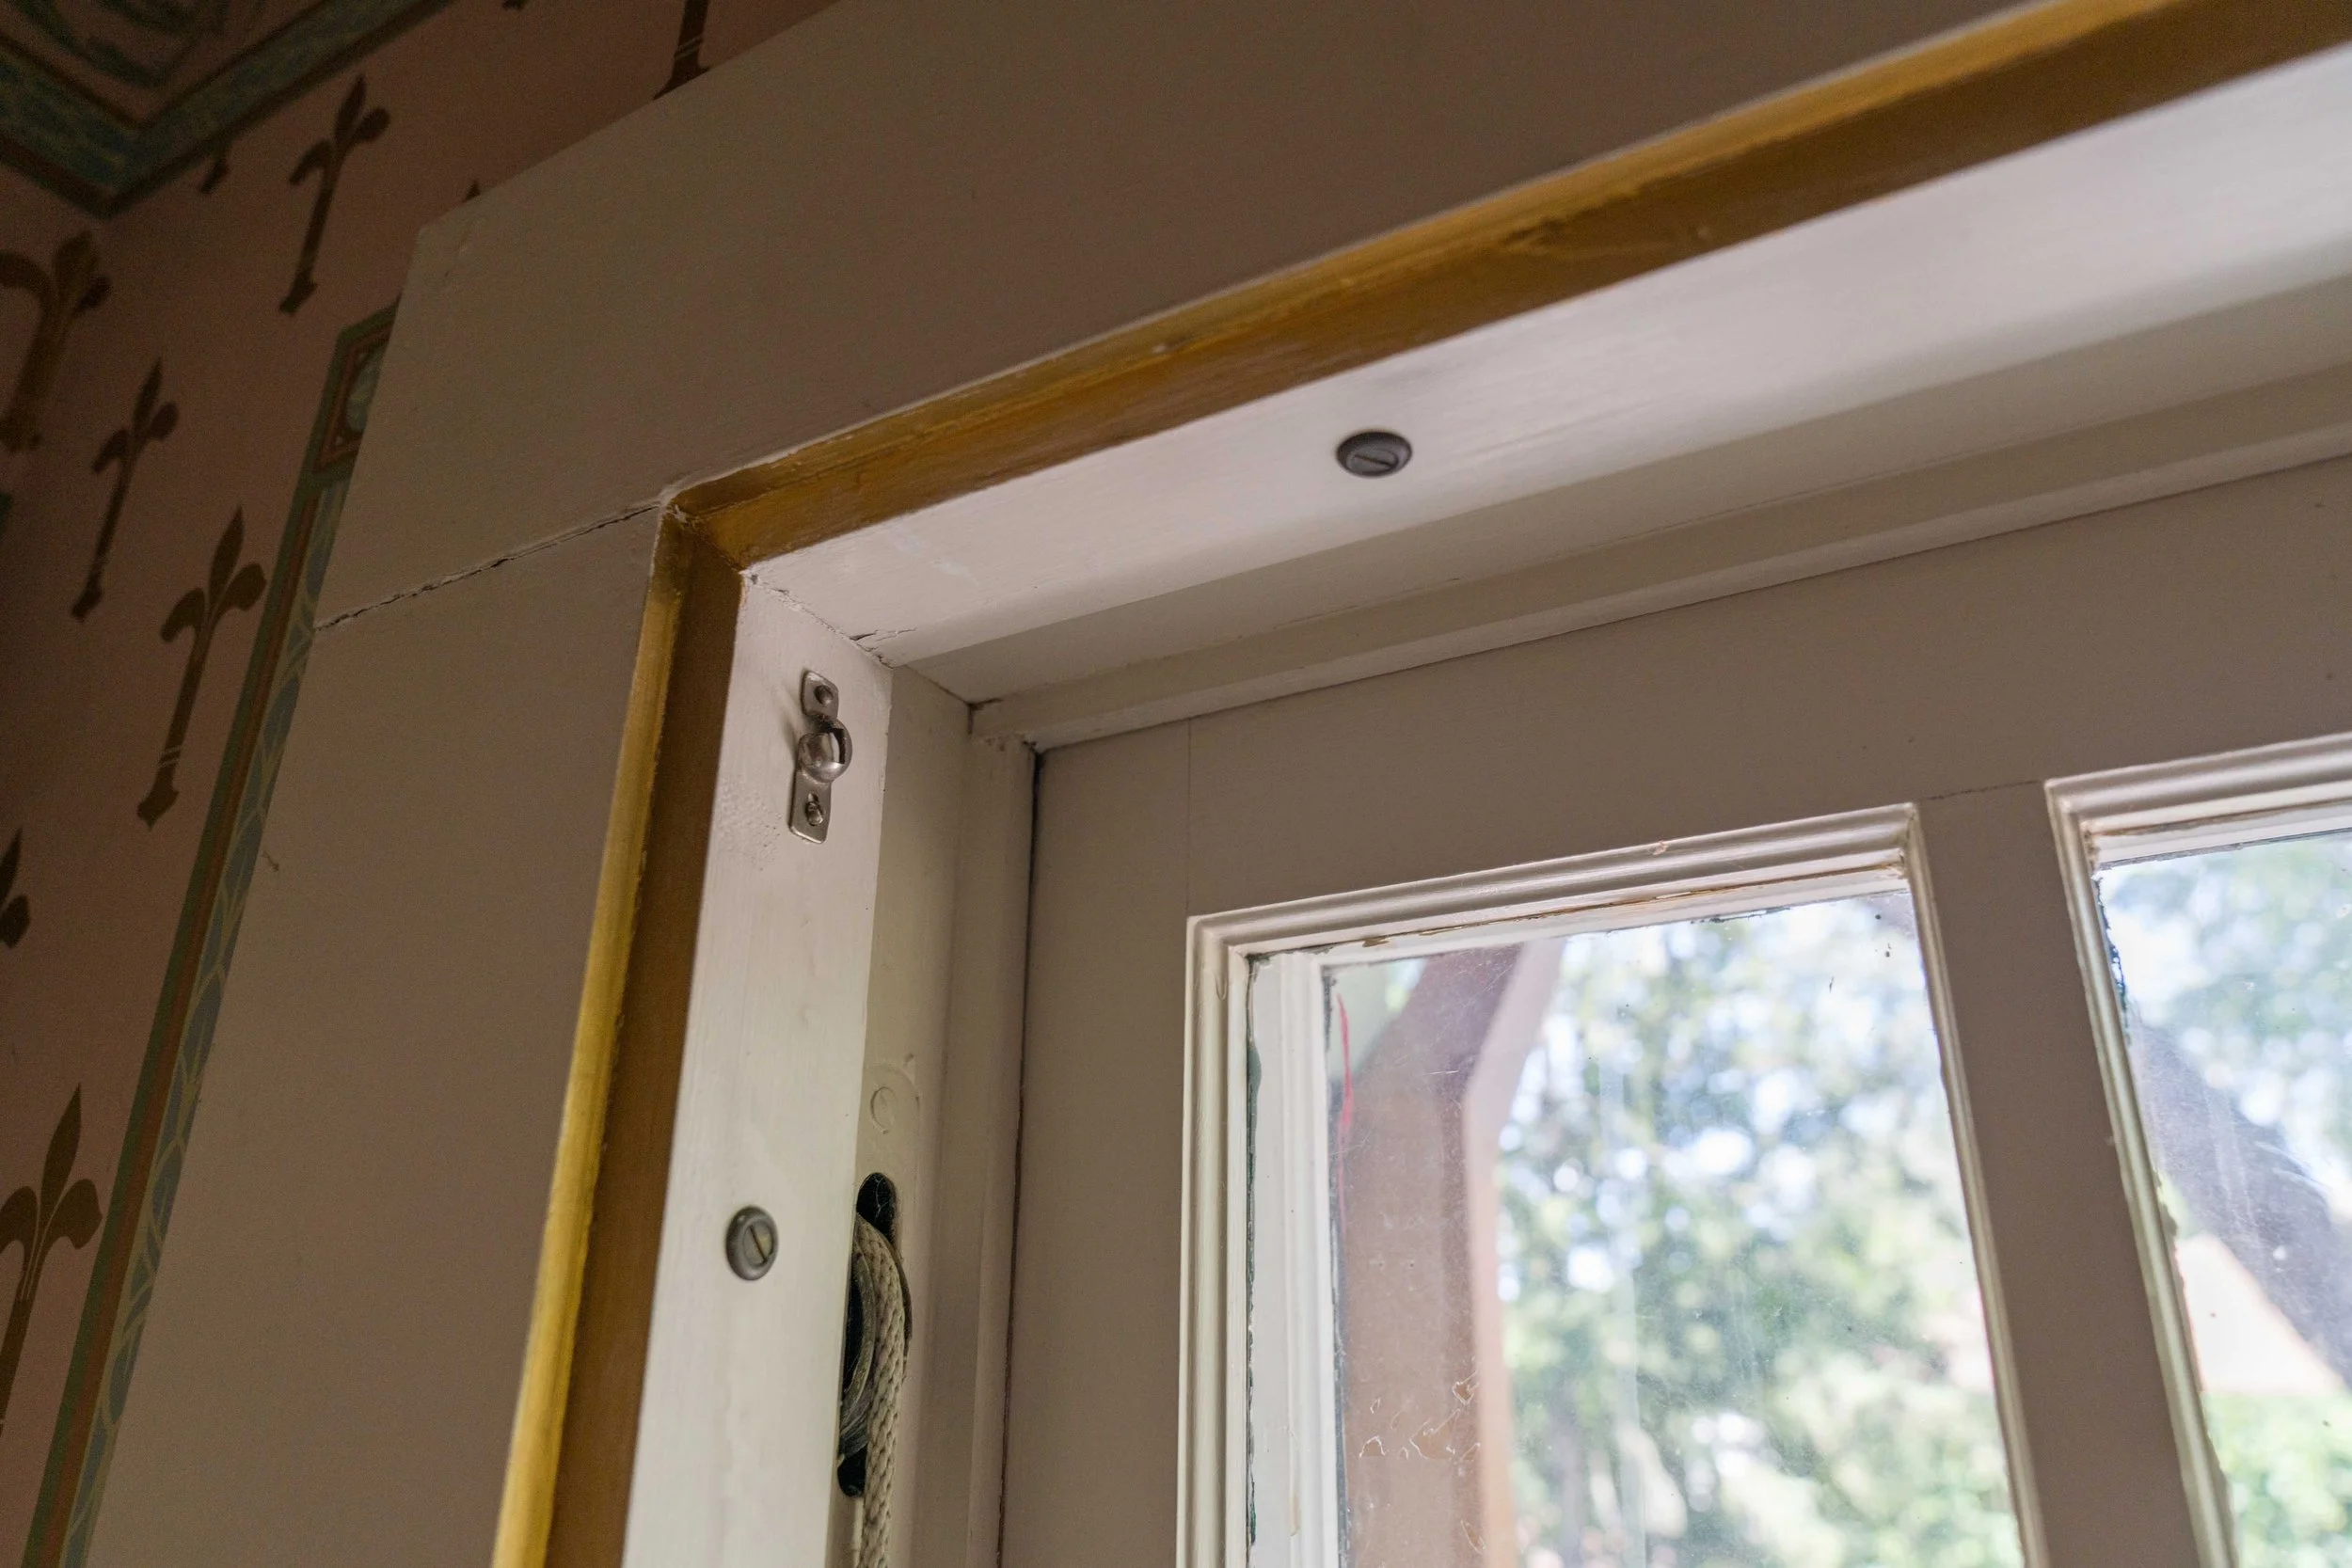
I wanted to figure out a way to not need to drill unnecessarily into the window frame. Additionally, I didn’t want to go out and buy more tension rods. We had some cheap ones left from the previous owners that help up the green polyester, but that didn’t seem durable or strong. It is so annoying to have a curtain rod fall down on your head!
So I went to inspect what was behind the paper tension rod. It was a wooden dowel with a removable metal system. I could pop it in and out! Success! I decided to recycle the old system and use that as the rod for the new panels! Only needed to rip off the paper and remove some small nails. :) So that was a great realization!
The Construction:
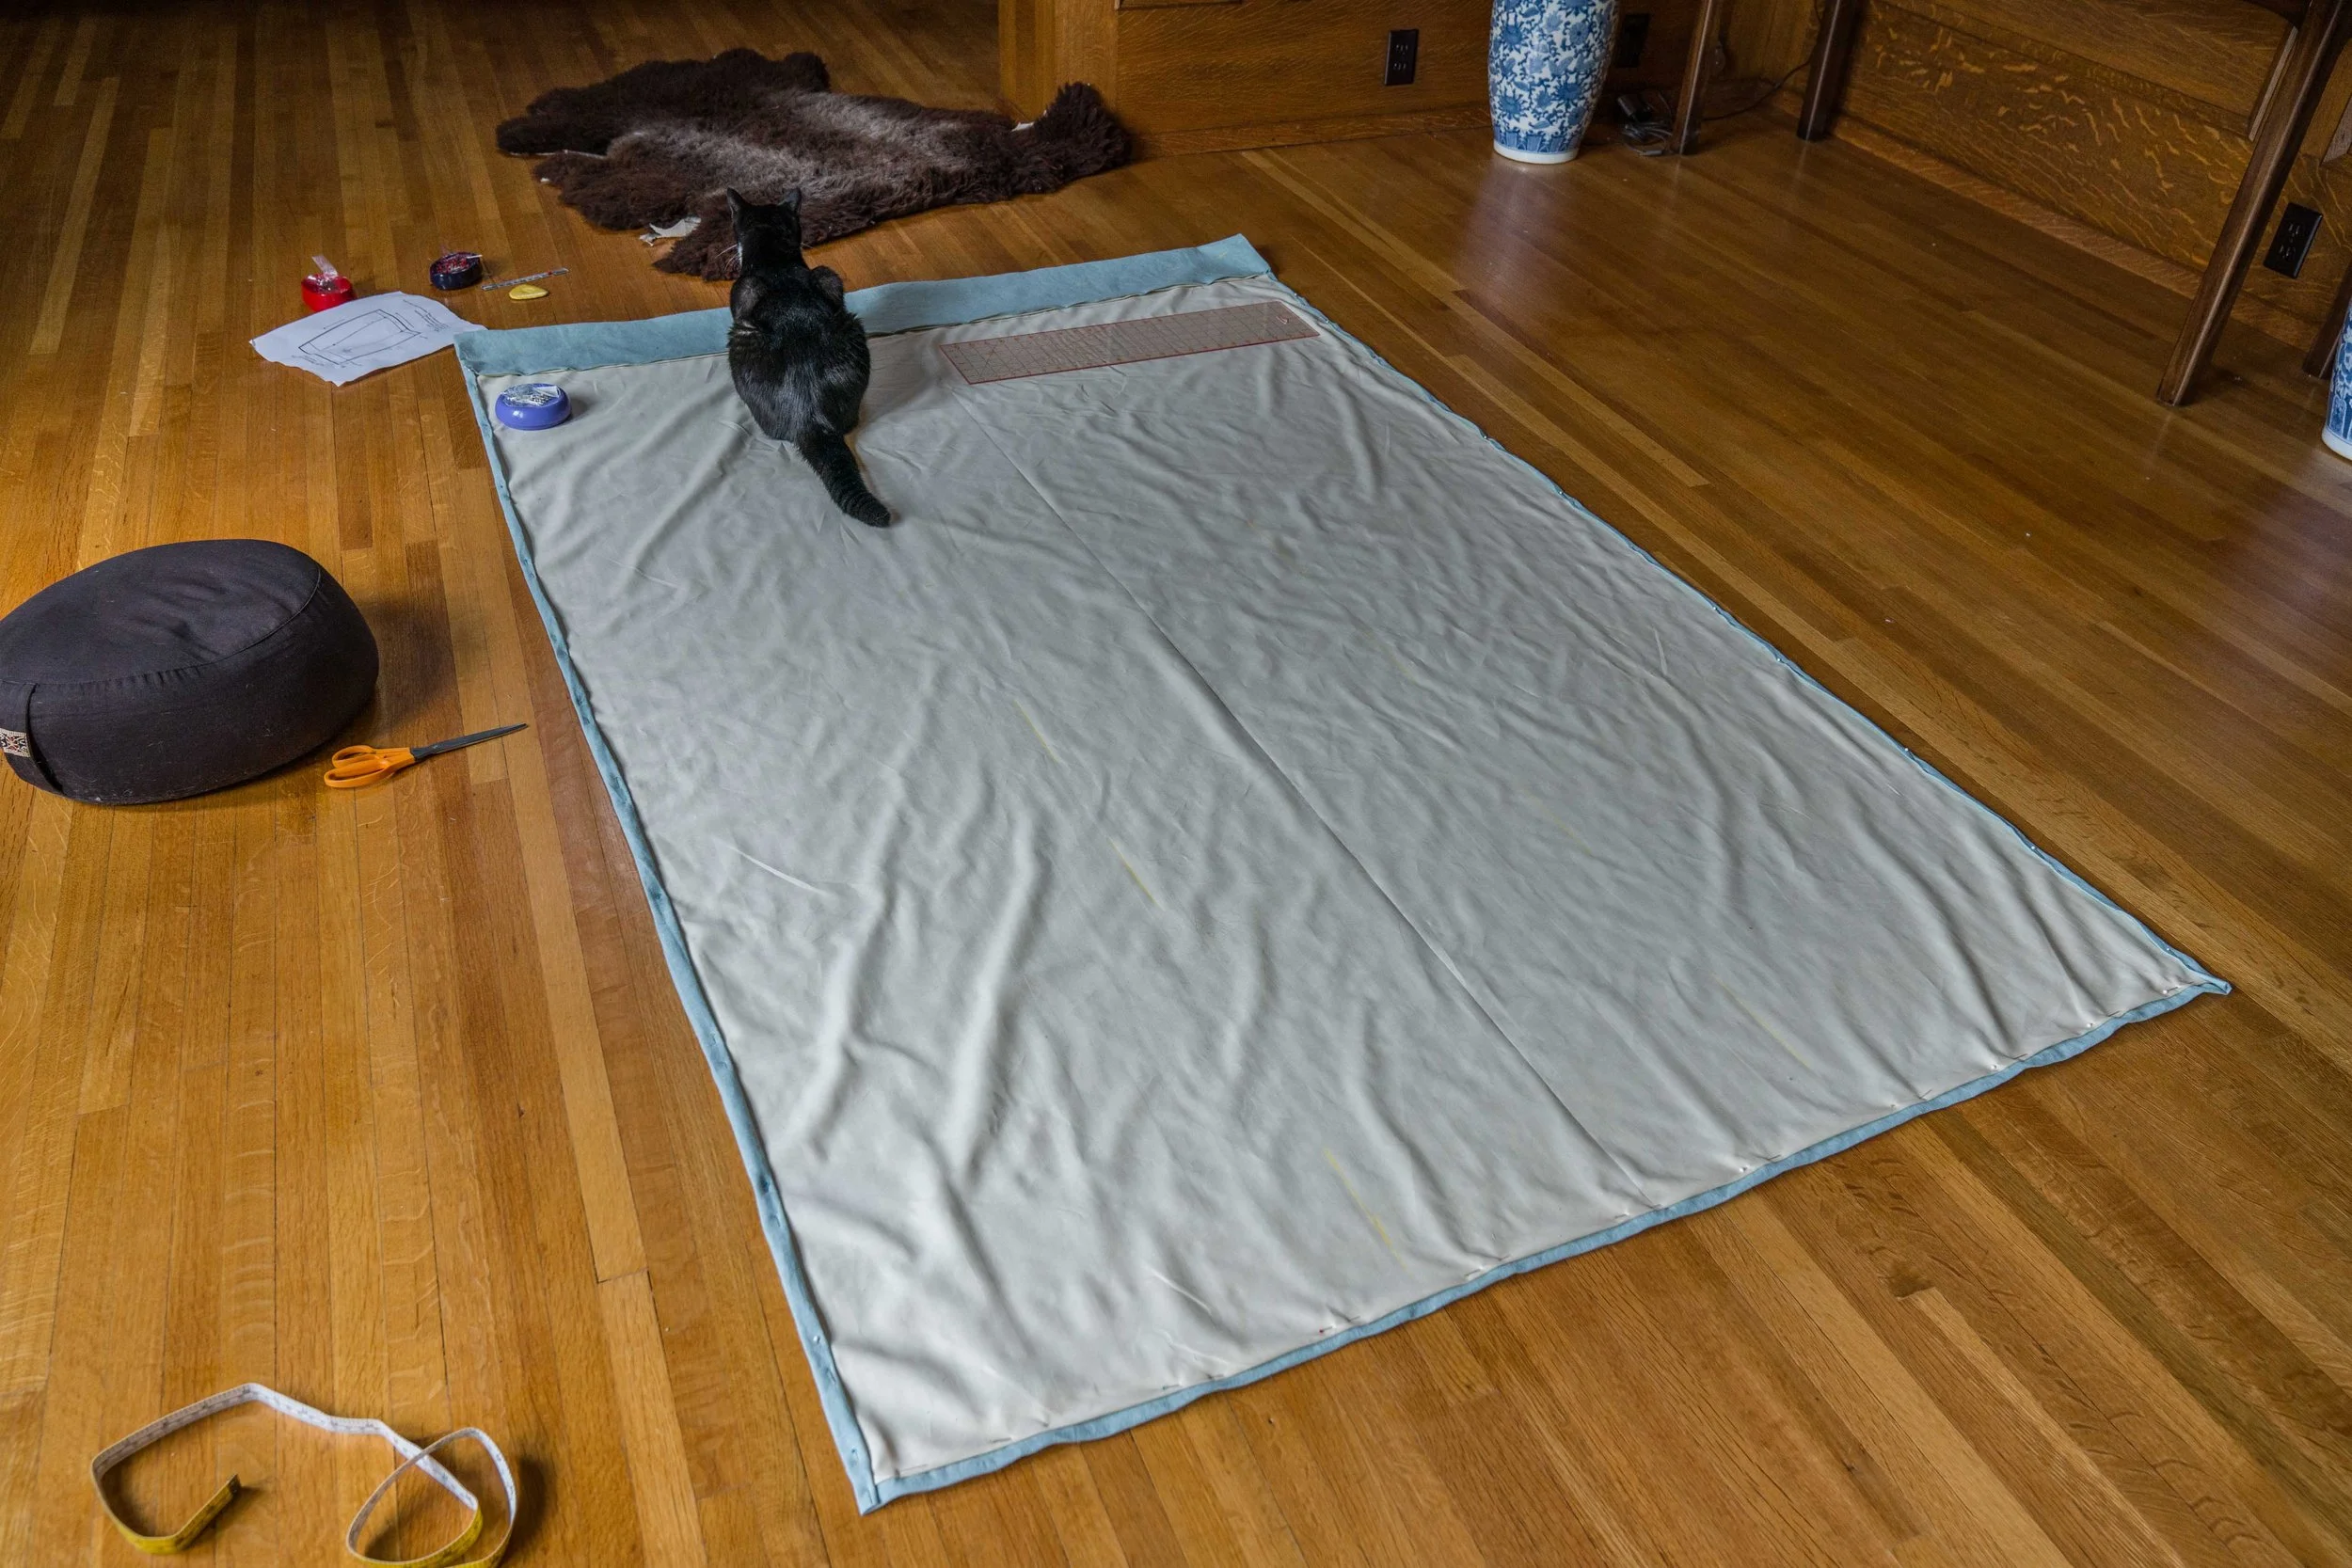
After cutting and ironing the liners and linen panels, it was ready to pin and sew the linen to the liner with a finished hem. You can get the gist from the above photo. We then measured where the curtain rod would be in the window, also factoring the gap on the top from the rod to the top of the frame. This space was 1 in. So we sewed the pocket for the rod, after folding down the fabric 1 in below, and 3 1/2 inches folded down for the curtain rod seam.
*Our initial prototype I wanted a full panel of Austrian tape. We had two problems with that. 1. The material when fluffed curled in too much on the sides creating a strange opening between the window and the curtain, ugly and a privacy issue. 2. The Austrian blind tape is relatively cheap/low-quality that is on the market today and a string broke so I had to remove it all and re-sew on the tape.
*We decided to divide the width by 3, making an 18-inch space between the two tapes. After the initial prototype re-development, I liked having the tape begin at 42 inches below the bottom curtain rod seam. We also realized it looks best with 4 pieces of Austrian Blind Tape in total. As you can see in the photo below.
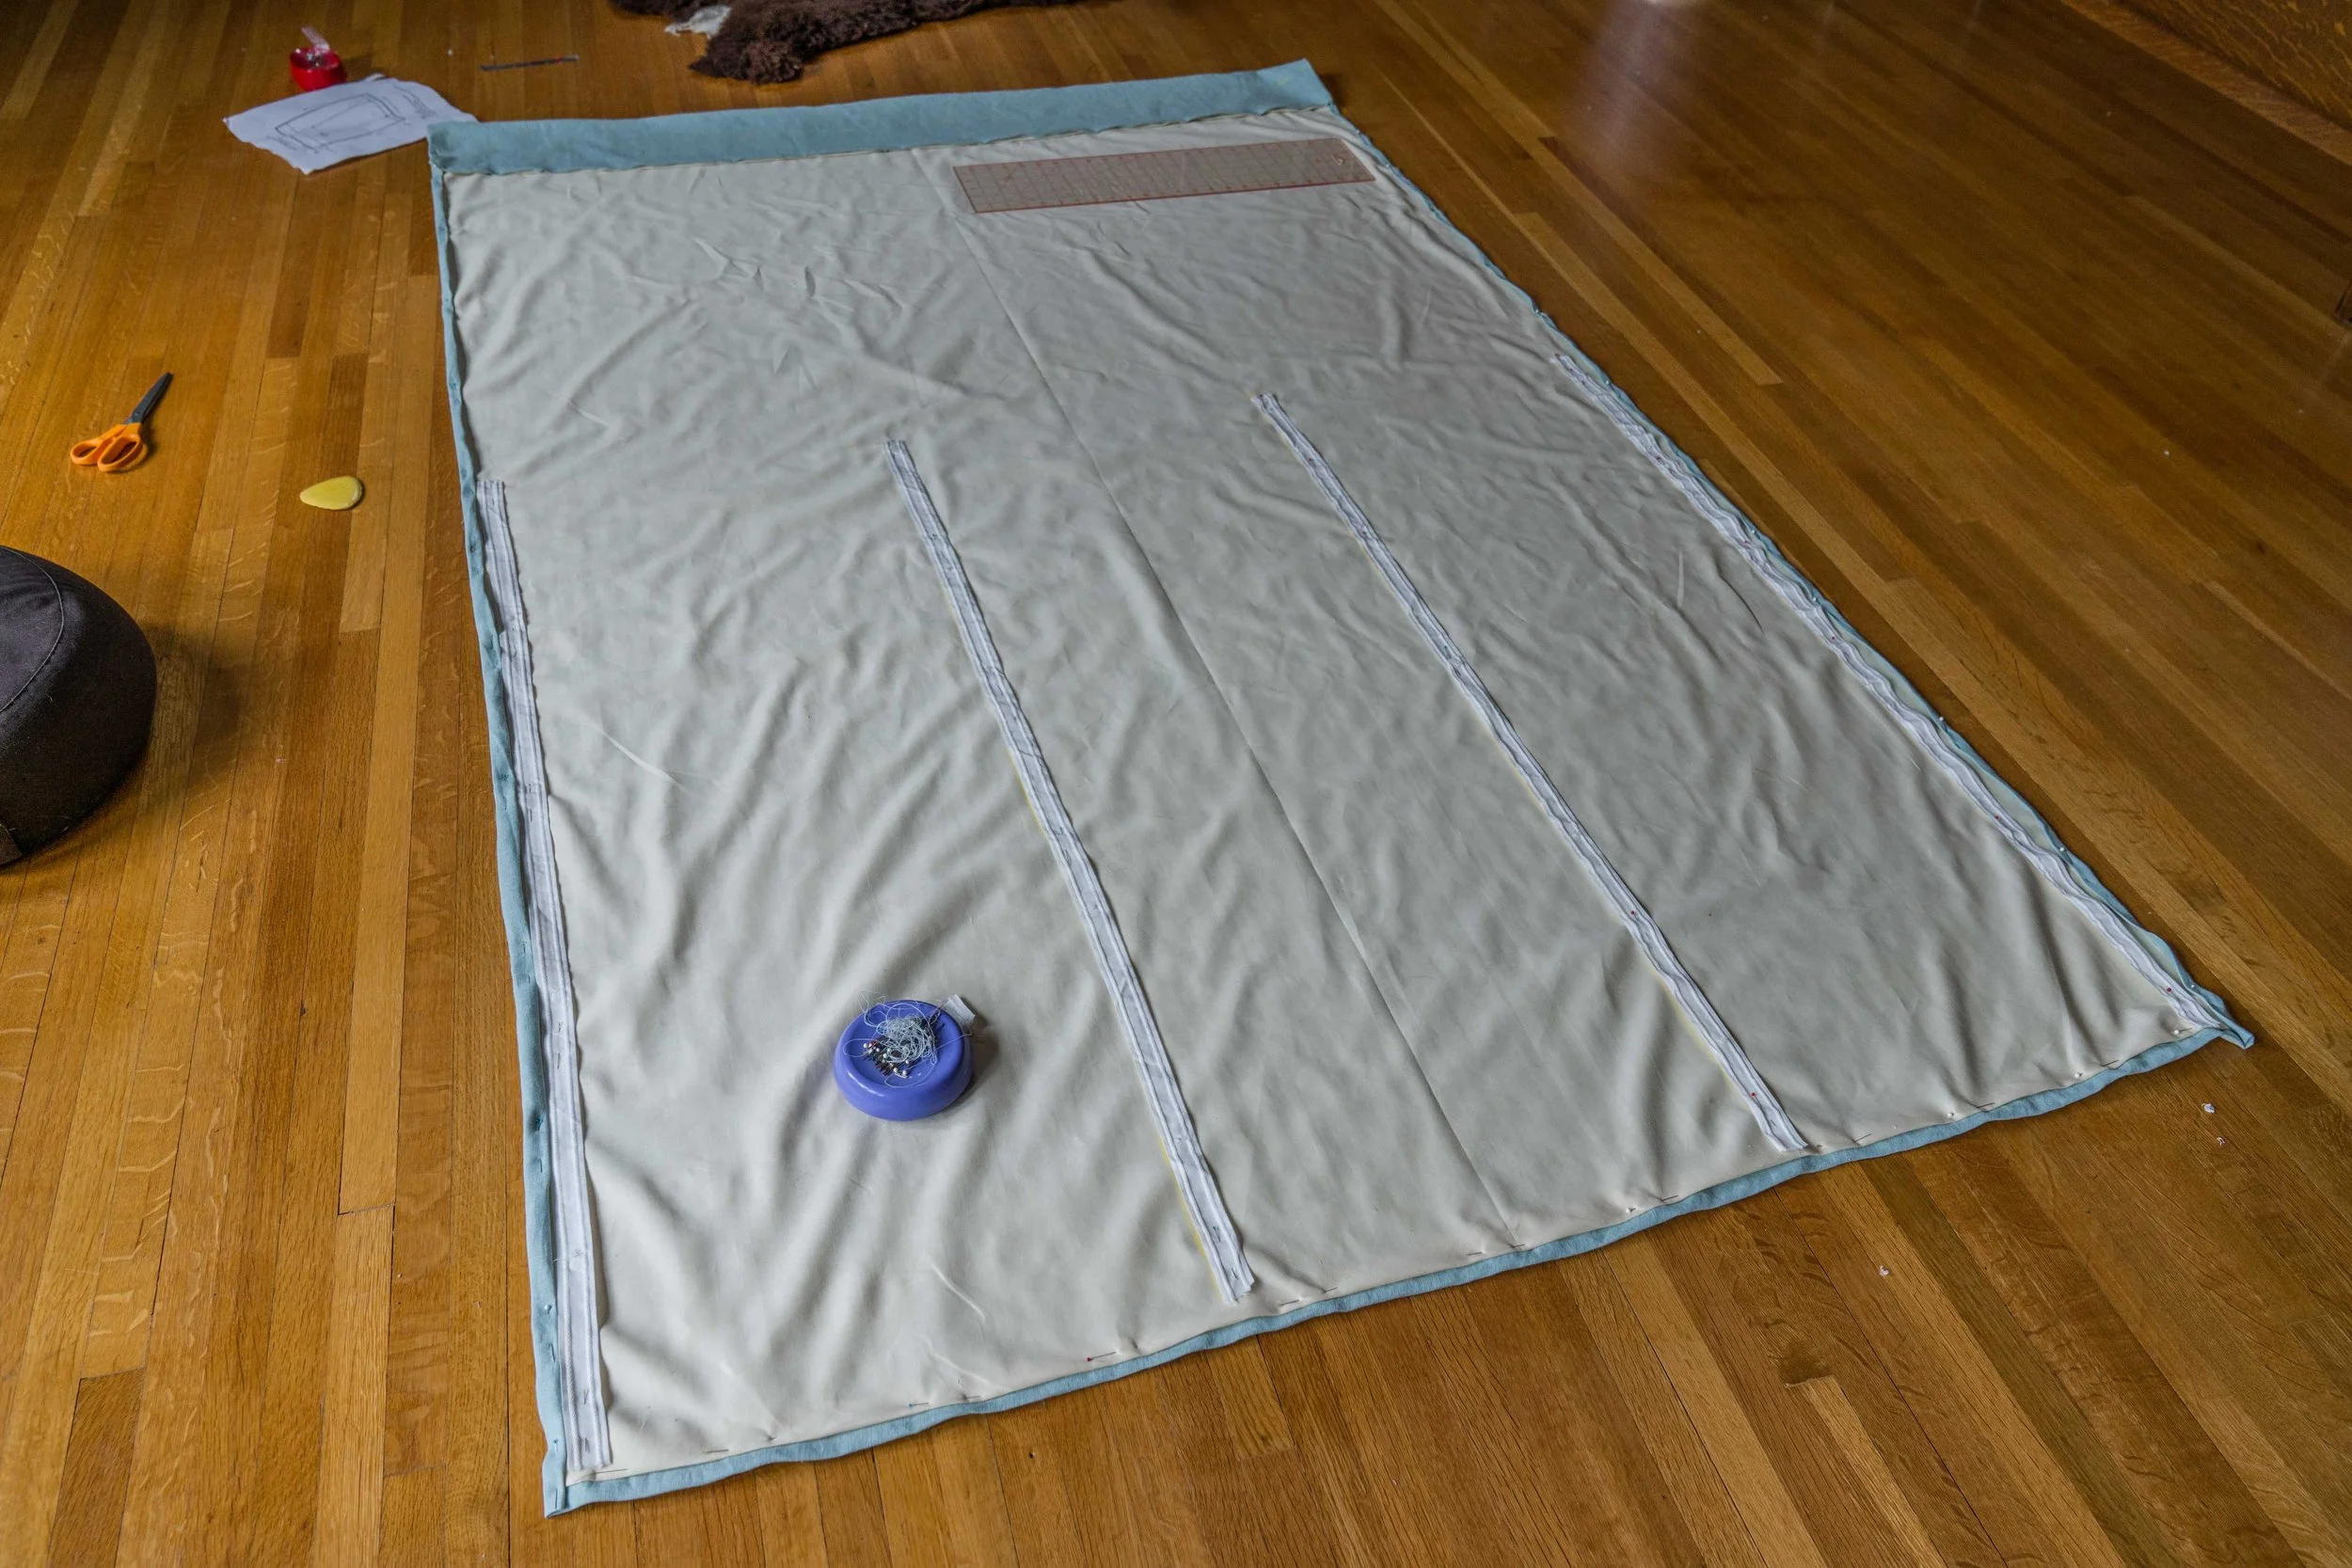
The above photo shows the pinned final version of the curtain. It took a few tries to get this down. 4 pieces of Austrian Blind tape with the rings removed. We decided to cut them off since I wasn’t doing the full panel of tape, it made it easier to sew it on, stitching down the middle between the two strings. We decided to just use curtain pull-backs and hooks to open, versus a pully system.
You can see the folded edge for the rods, plus the tape, and the edges pinned to be hemmed.
One important step!! We learned the hard way, make sure to really sew and reinforce the top seam of the Austrian tape. This secures the strings when you pull on them to create the ruching effect.
Austrian Blind Tape- Essenially, two flimsy strings encased in a ribbon that you pull to the desired length to make the fabric ruche- makes it easier to create the Austrian effect.
Next thing you do is sew it all together, the easy part haha!
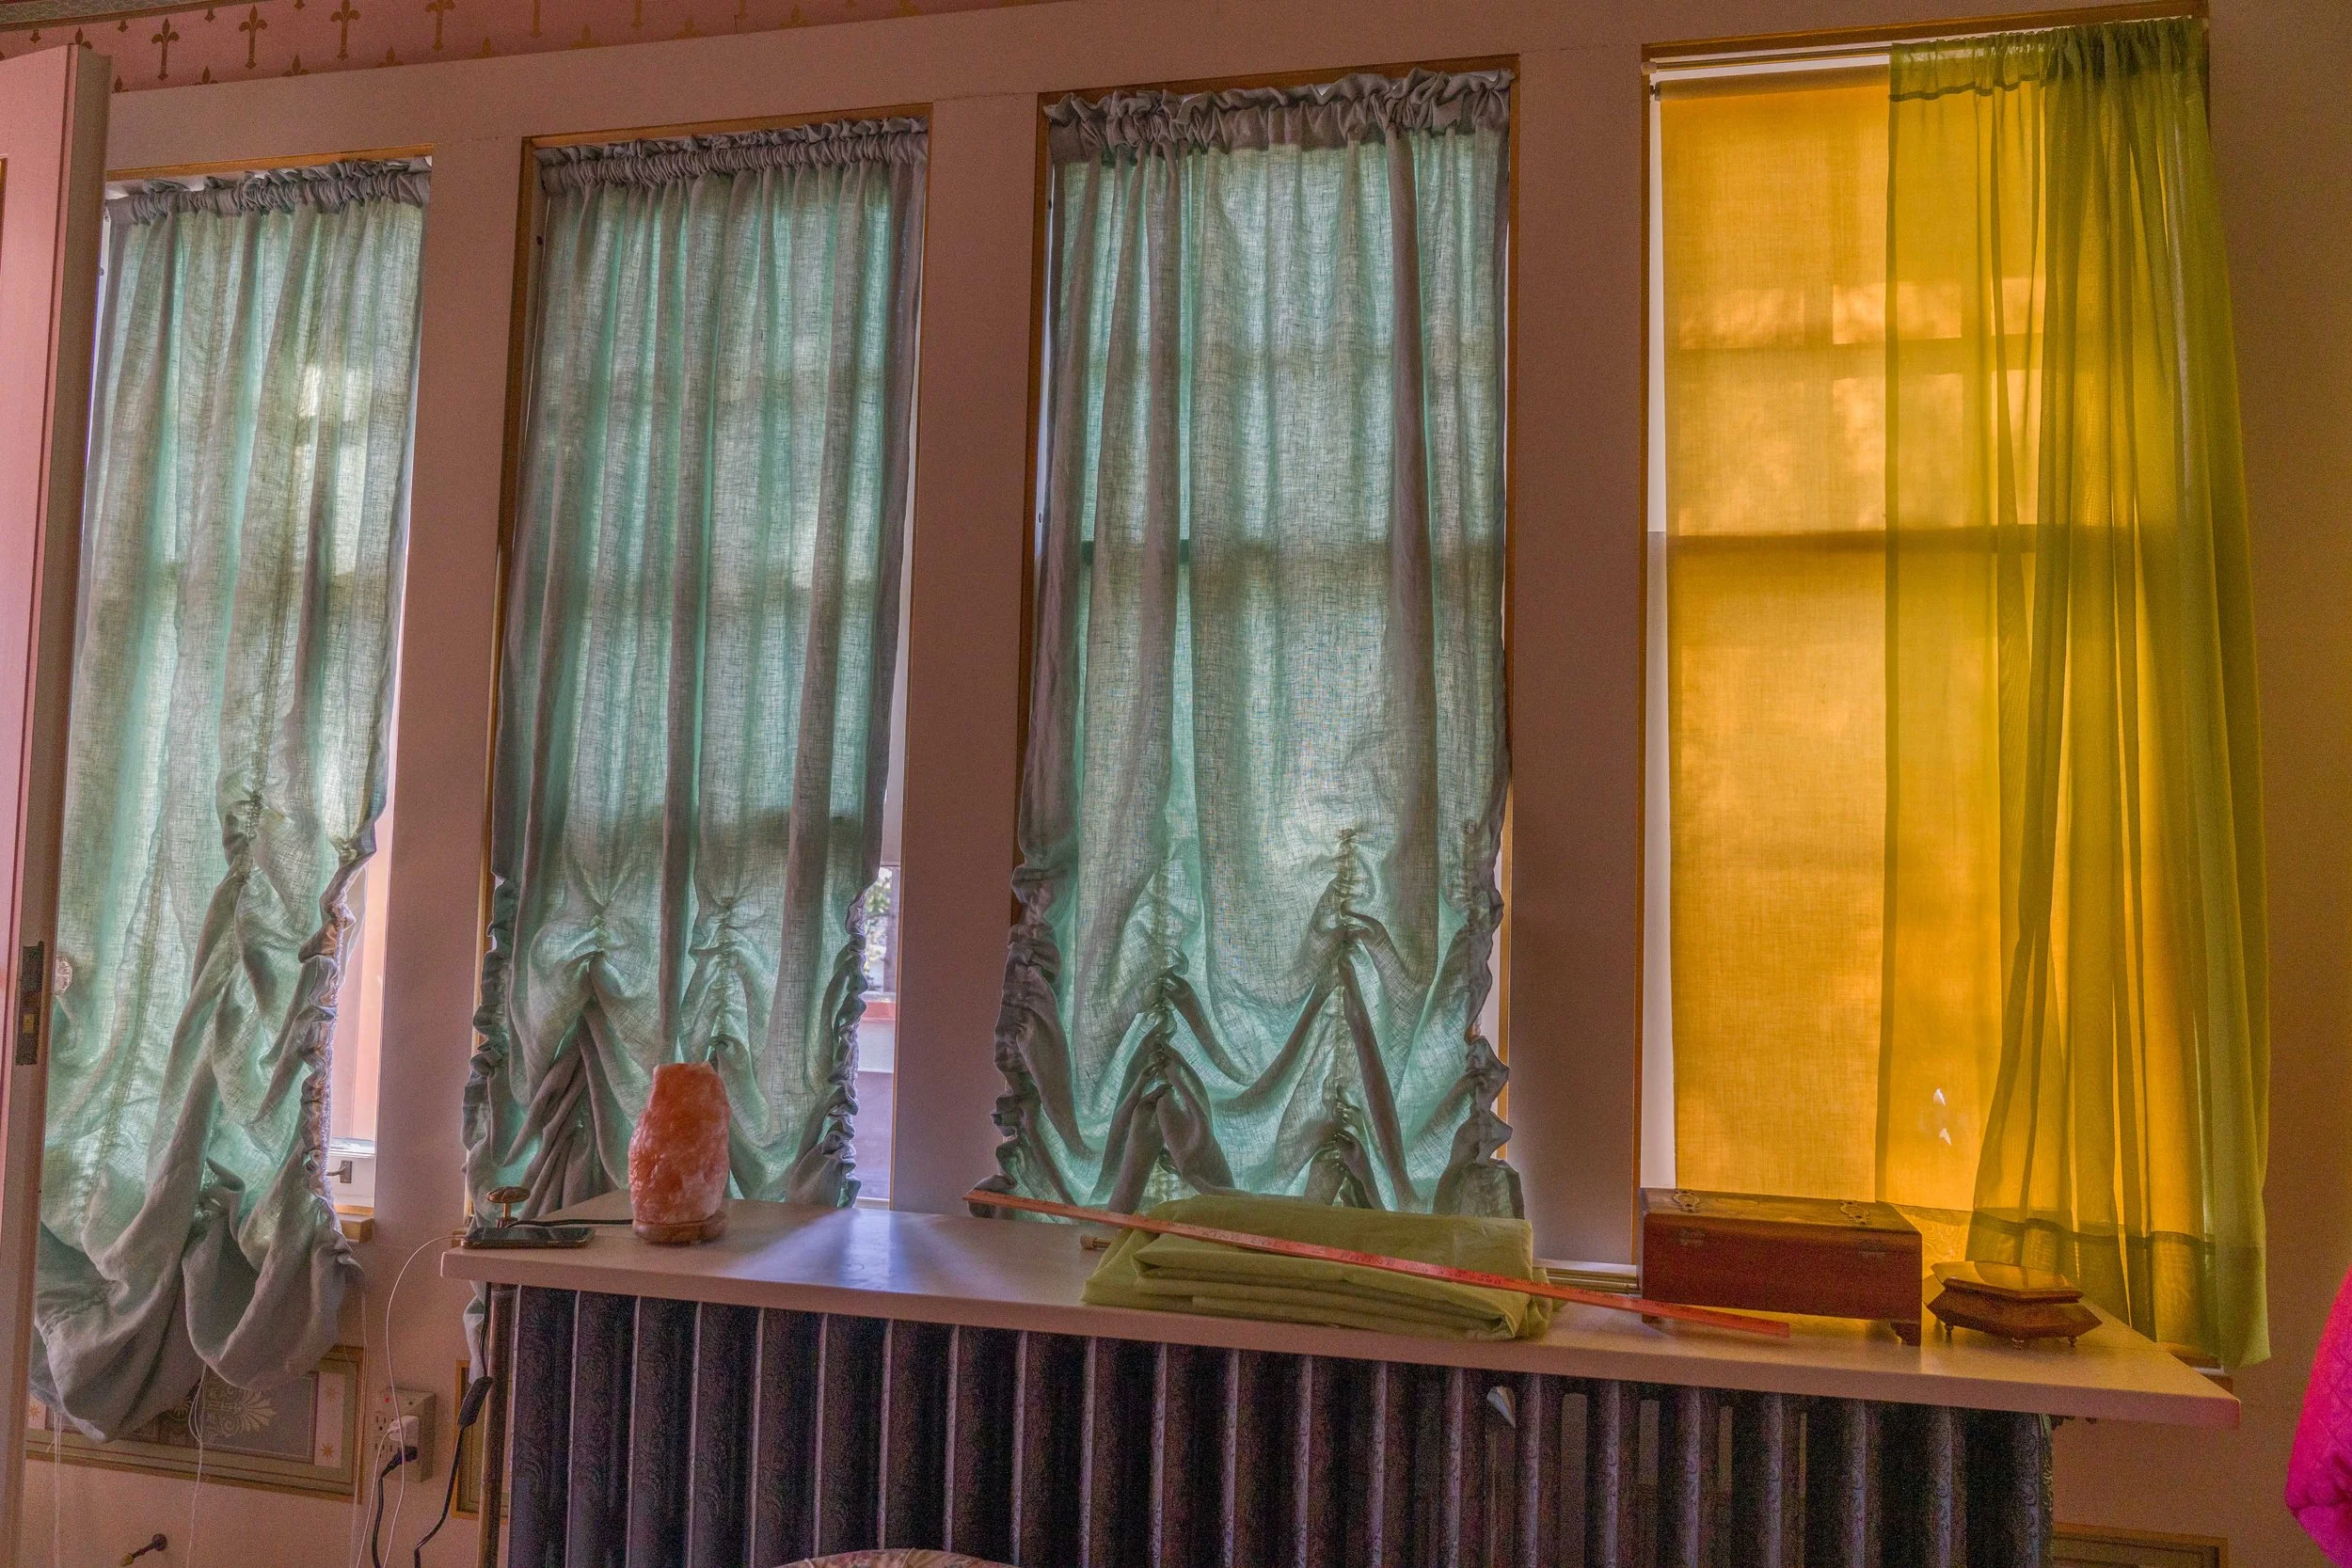
All the way on the left was the sad prototype. You can see with the middle tapes going all the way it just looks a little, meh. We improved with each panel, but also encountered some different challenges with every one. You can also see how the Austrian Blind Tape works, and how it is important to do the final pulling and fluffing to make them all somewhat uniform. The side-by-side comparison of the polyester to the linen is quite shocking in my opinion!
The Result:
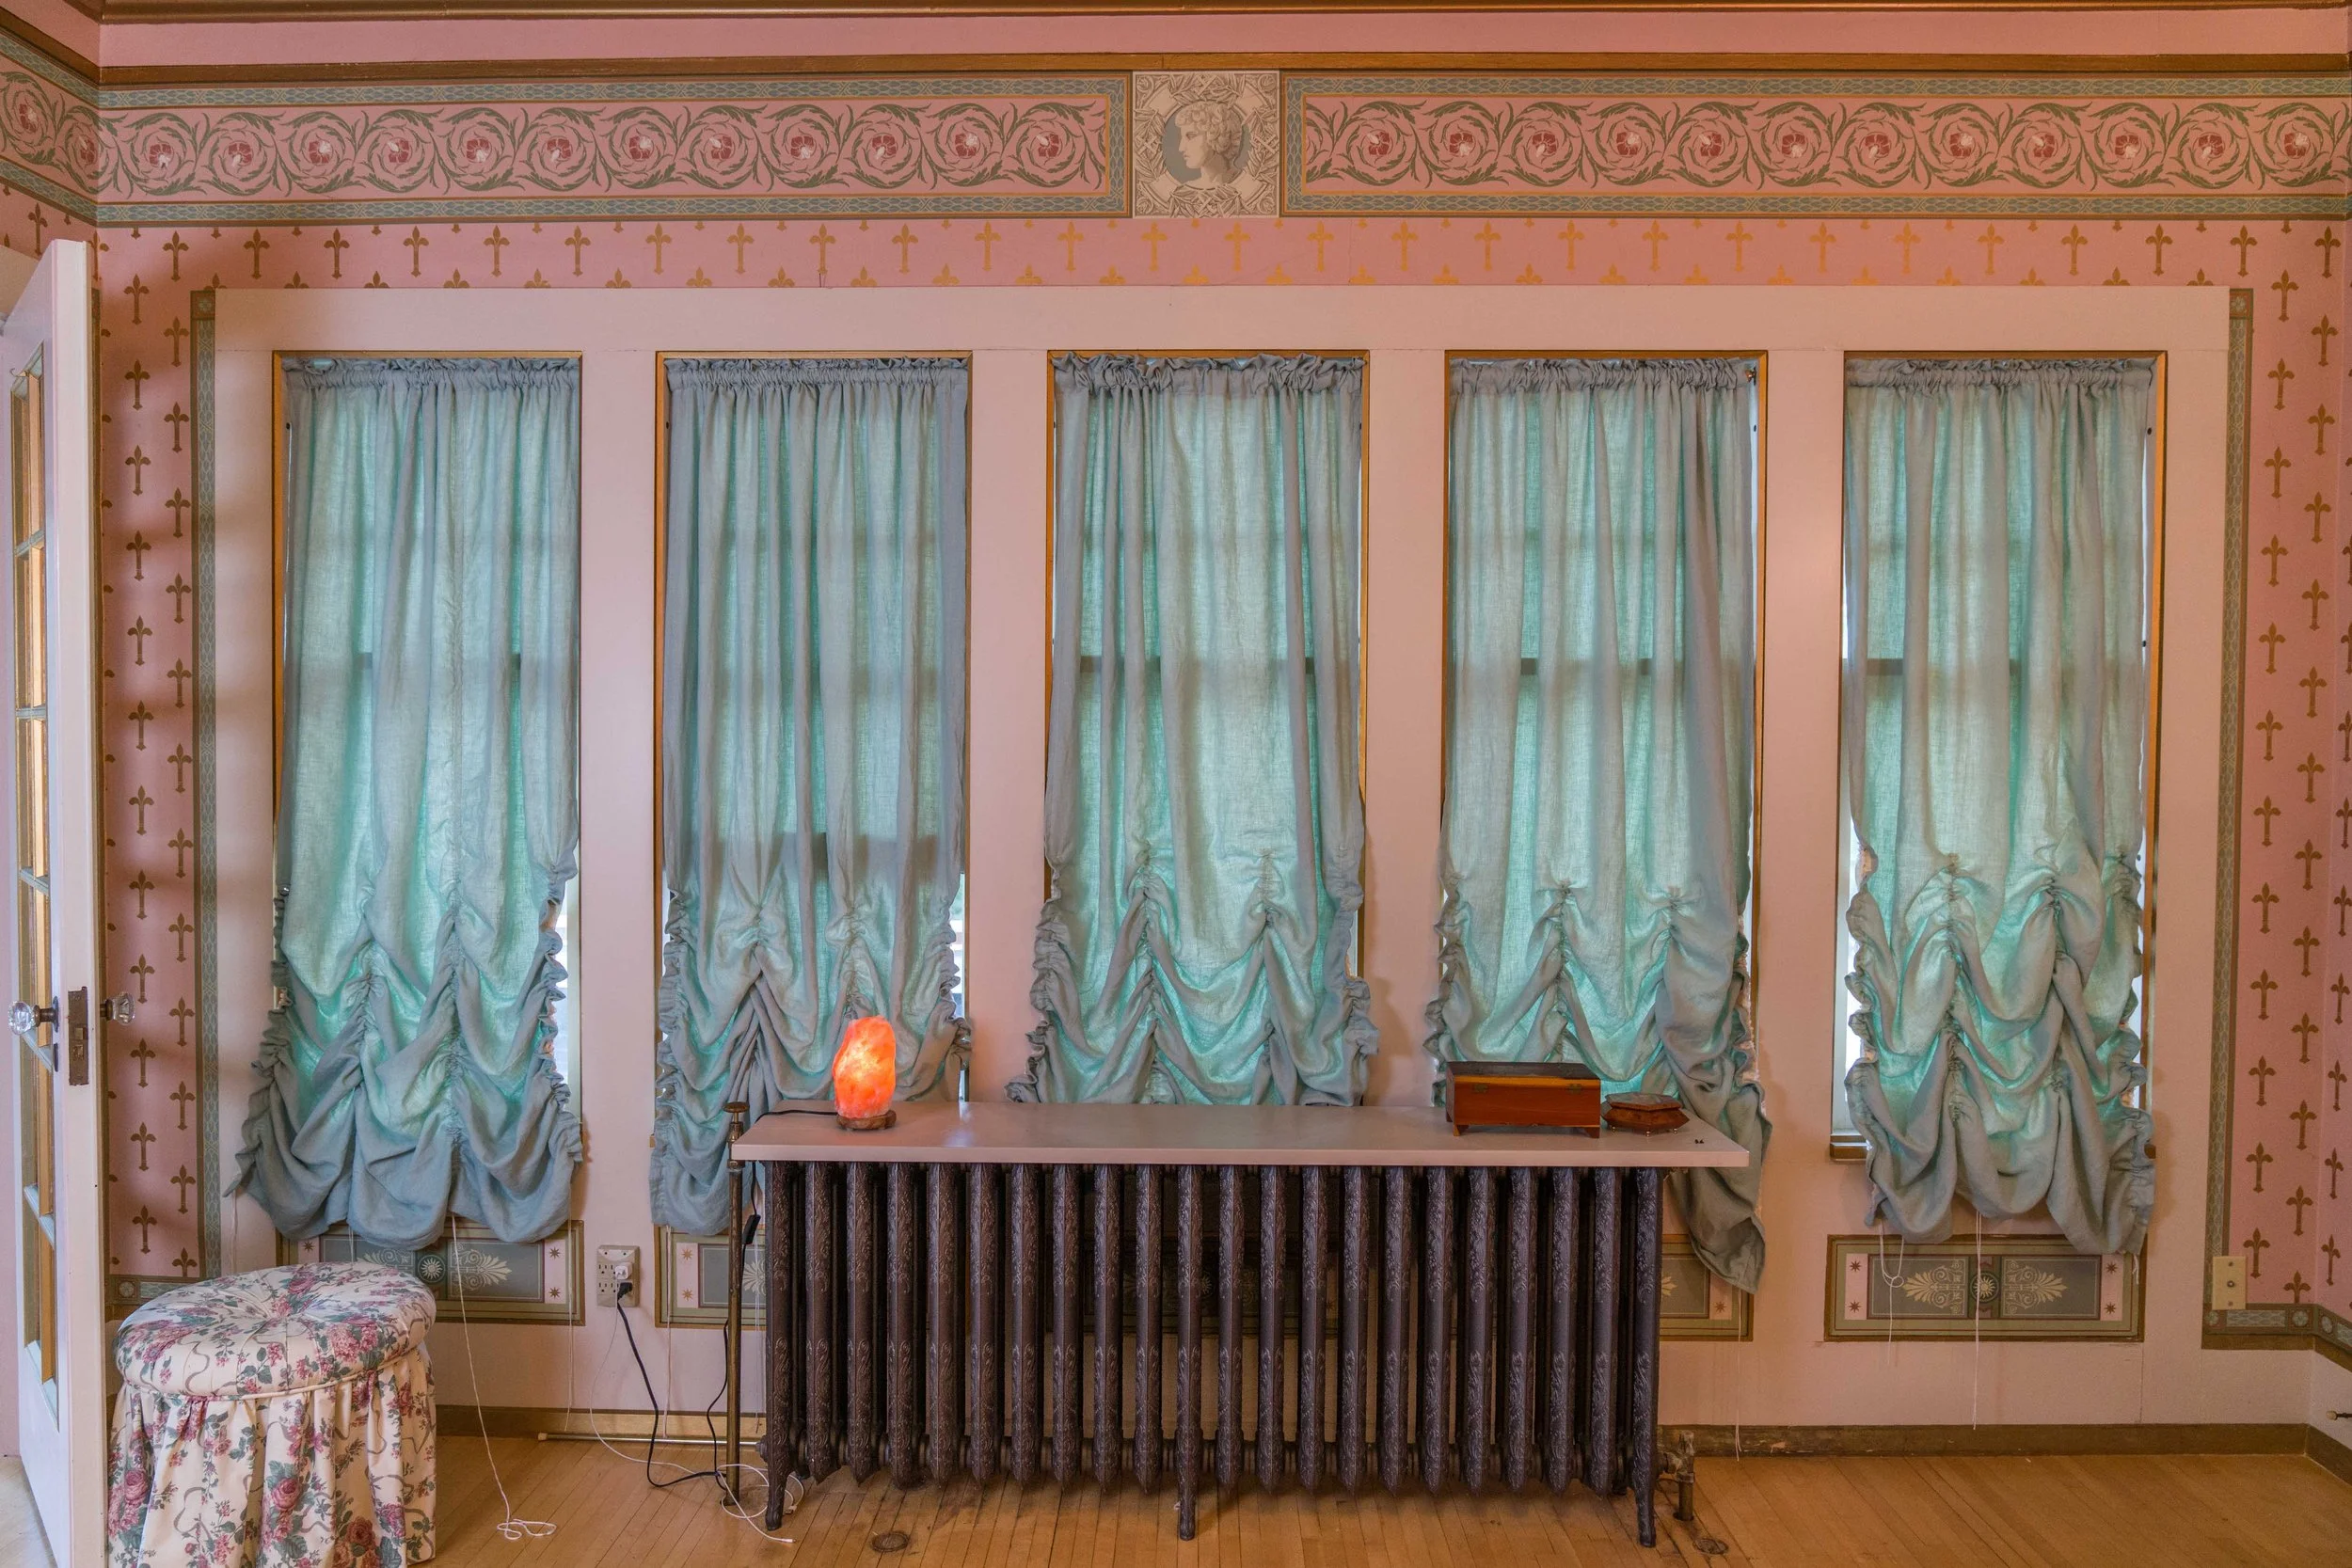
We decided to not tie off and cut the strings in case of future adjustments are needed. I still need to do some wiggling around with the ruche to make it uniform and with the most privacy. I am also still on the hunt for the perfect curtain tie-back hook for these. Never-the-less I am so happy with the new result!! They look feminine, match the wallpaper, and have a great translucency in the morning sunlight.